Today my blog was down for some time due to a memory issue in php.ini file in my server. I have never seen this error before and i don’t know what went wrong. I quickly searched on Google and found that this error is caused by insufficient memory allocation in php.ini file. A standard server (linux box) setup comes with 8M memory and we need to increase this to avoid these types of errors.
Error:
Fatal error: Allowed memory size of 8388608 bytes exhausted (tried to allocate 8192 bytes) in /home/teknobit/public_html/wp-includes/theme.php on line 59
I managed to increase the memory in php.ini to overcome this, i will write here how i did it hoping that it may be useful for somebody.
For those of you who use shared hosting the quick solution would be to add a line in .htaccess file located at your root folder.
php_value memory_limit 24M
here 24M is an example and most of the times this is enough to get your site back, contact your host support if this doesnt work.
First step for this is to locate your php.ini file in the server and to see what is the memory limit (this is shown in the error message). Create a file with the below code and name it something like “test.php”
[php][/php]
Upload this file to your site root and point your browser to this file, now it will show the phpinfo of the server, in this you will find “Configuration File (php.ini) Path: /usr/local/lib/php.ini”, this is your php.ini location. You can find the memory limit also in this page “memory_limit: 8M”
If you know shell then you can use putty, SSH client, login to putty and locate the file php.ini and edit the memory limit, below commands may be useful; found here
Log in as root.
Type the following and hit enter: vi /usr/local/lib/php.ini
Now that you’re in vi, hit escape a few times then type the following
and hit enter: /memory_limit
That basically does a “find” in the file you’re editing.
Press the “i” key. This puts you in “insert” mode, which basically
allows you to edit things.
Change the current setting (probably 8M) to 16M.
Press escape, then type :wq and hit enter. That says “save the file
and quit.”
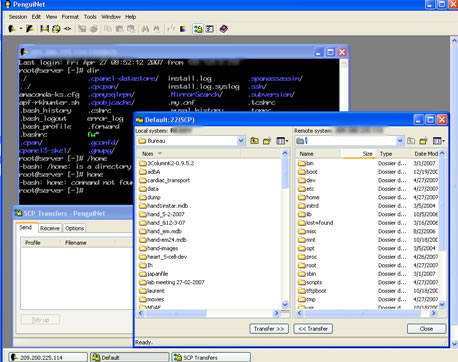
I dont know shell commands so the easiest way for me to do this is using penguiNet, (Update: Use WinSCP, this is free tool) its a windows SSH client, you can use shell commands or use the ftp like interface to navigate to the php.ini file. Login to server with root account and download the file, edit it and upload it again. Remember to backup the original file, if you make a mess you can use the original file.
In php.ini search for this line “memory_limit = 8M”, replace the 8M with your desired value like 16M, 24M etc. Save the file and upload it to the server. Now you need to restart Apache for the changes to effect, this can be done through WHM, if you dont have WHM installed use these command
/etc/rc.d/init.d/httpd restart
Refresh the browser, your site should work normally.
By using the same procedure you can also increase the file upload limit size, in this case search for the line “upload_max_filesize = 2M” in php.ini and change the value to your desired value. The dafault upload limit in php is 2MB.

This totally solved my problem uploading large files from to my wordpress blog… thanks for the great info, super helpful.
@kanyan
glad that it helped you. Thanx for commenting
If you are in a shared account i guess you can not edit php.ini file because the changes will be effected to all the accounts on the shared server. If this is the case you should contact your host.
Try to add the values to .htaccess file and see if that helps
Thanks for this tutorial!
This was a great help and like you i’m not too familiar with SSH commands, i managed to update my PHP ini file and now my upload limit has been increased.
Many thanks..!
@lasdesign
glad that it worked for you
Can u please tell me how do i locate the php.ini file in the server ?
I have a shared hosting on HostGator and they are using cpanel ! I aksed them to help me but they said they dont support 3rdpart scripts 🙁
how to serch php.ini file in linux os
@Latina
Thanks for the headsup
I’m trying to access php.ini for improving my proxies but not being able to access it coz im using shared hosting! 🙁
i’ve tried to send mail from my website but it is giving me this error
Warning: mail() [function.mail]: “sendmail_from” not set in php.ini or custom “From:” header missing in C:\Program Files\xampp\htdocs\mailto.php
m really stuck here and would really appreciate your guidance
thank you in advance
This article is great I love to read it and very helpful for my project
thanks
hi
i got error in image uploading
@Ashok
What kind of error ?, is the error after editing the file or before.
Hi I tried to change the setting using filezilla but no use.
Is there any way to change the settings using ini_set
Thanks – worked like a charm!
Try to add the values to .htaccess file and see if that helps
what values do we have to add to increase that 8M limit ?
@Recorded
add this line to .htaccess
php_value memory_limit 16M
change last ’16M’ to whatever value you want. Some time this may not work depending on httpd.conf settings, in that case talk to your webhost.
I’ve tried to add php_value memory_limit 24M to my .htaccess on my root, however that completely crashes my site and I get a 500 error… any other suggestions besides contacting the host?
Thanks!
I have a VPS so I have ssh access of course. My php.ini file says it’s read only and won’t save the changes….this doesn’t seem right.
Any suggestions?
PS – the ESC step doesn’t work for me…maybe it’s not necessary.
@mdowsett
try changing the permissions, you can use chown command for that, once you are done change it back.
or use winscp to login and then edit the file in your computer
Thanks for the tutorial.
Very helpful!
im trying to get this to work, so i can use more plugins from wordpress. Im actually using my friends account ( he works for a hosting site )
He told me, Im not allowed to edit my php.ini file and he said, they wont change my php.ini file either (unless i get a better plan)
So my question is, how do i increase memory with out messing with the php.ini file. Or am i screwed?
you may be able to add this line to you .htaccess file:
php_value memory_limit 24M
You’re probably only at 8M or 16M now.
If that doesn’t work, you’re SOL
You saved my day
Thanks for the walk-through. I didn’t know how to edit files on the server (and couldn’t otherwise overwrite php.ini). Thanks!
Thanks for the detail admins
Thanks for this great tutorial.
Hey guys, I’m trying to find a way to change some values in the php.ini. that I need to install a tool created in php.
I’ve found something on the internet, and they say that I have to create a new php.ini with the specific values that I need to change, but my question is, in what directory do I have to load my php.ini with the specific values?????
(I’m in a shared hosting by the way and I don’t have access to shell or any adminstrativve option =( )
Where am i supposed to place the line in my .htaccess file ??
THanks
adding php_value memory_limit 24M to .htaccess fixed my error. Thanks for the info!
That really worked for me to increase max upload file size.
Great Article… 🙂 (y)
I have successfully altered the php.ini file but wordpress is still only allowing 2MB uploads. please advise.
Thank you! I was in the same boat, needing to edit my php.ini and this made the task very easy to accomplish.
Its very easy to edit php.ini by finding its location using phpinfo() function .But Is there is any way to update that value dynamically using ini_set() function?
i tried it but doesnt work for max_upload_filesize attribute.i think we cannot do this for that attribute.
thanks. I was in the same boat, needing to edit my php.ini and this made the task very easy to accomplish.
I FUCKING LOVE YOU! ♥ 😀
Thanks, that save my day.
Hi, i ve tried to connect Mssql server 2008 database thru ODBC connection from my Cake PHP site. i didnt get all the field name char from Mssql server table due to some of them are little bit big size. for ex. i can get only 23 char out of 25 in field name. is there any option to set in php.ini file for increase the filed name size for getting full length?
Thanks for this post. Nice one. I love the procedure. I am currently trying to edit my .htaccess file. I hope it won’t result in an error.